Complete the following steps to create a new C1 ASP.NET Core MVC Application using C1 template:
- Select File | New | Project in Visual Studio 2015.
- Under Installed | Templates, select C1 | Visual C# | .NET Core | C1 ASP.NET Core MVC Application to create a C1 ASP.NET MVC Web application. For more information, see C1 ASP.NET Project Templates.
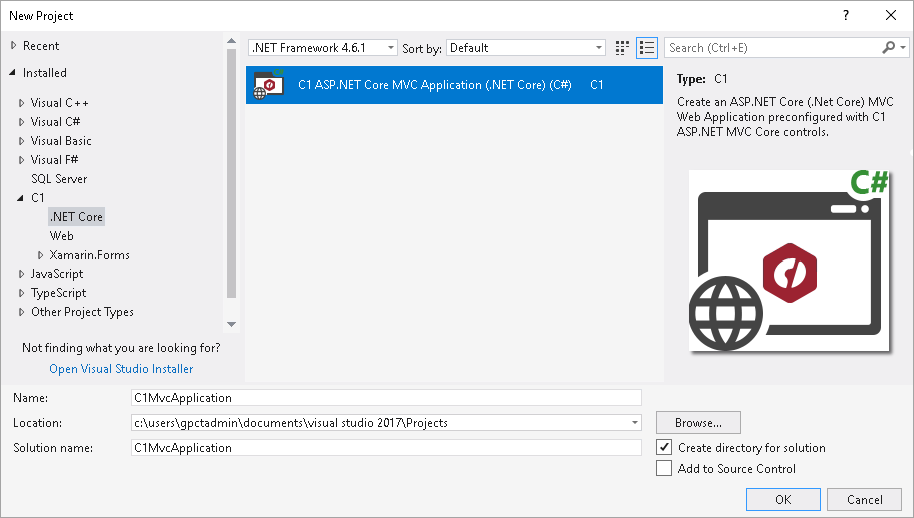
- Set a Name and Location for your application.
- Click OK. ComponentOne ASP.NET MVC Application Wizard appears.
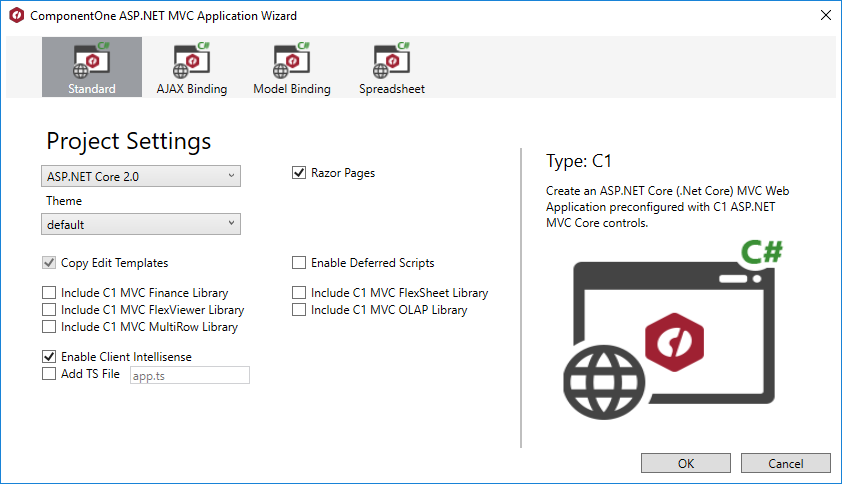
- Select a project type. In our case, we have selected Standard. For more information, see C1 ASP.NET Project Templates.
- Select the ASP.NET Core framework version for your application. In case you select ASP.NET Core 2.0 framework, the wizard enables the Razor Pages check box that allows you to create a Razor Pages web application.
- Select a Theme.
- Click OK. A new project configured to work with ASP.NET Core MVC Edition is created.
- To generate the runtime license for applications created in Visual Studio, use GrapeCity License Manager Add-in available in Tools menu in Visual Studio.
However, you can also generate runtime license through C1 website:- Create a License.cs in your project (by right-clicking the Project Name in Solution Explorer and selecting Add New | Class).
- Add the license key generated on C1 website in this class.
- From the Solution Explorer, open Startup.cs file and assign the key to it (For more information on how to add license key to the project, see Licensing).
See Also